


Are you currently traveling or about to set off on an adventure and looking for ways to improve your travel photography only using a smartphone?
I’ve been using a smartphone to take my own travel photos for almost 3 years now…
I’m not a professional or an ‘expert’ but by following these 10 strategies I’ve seen significant improvement in my photos.
You really don’t need a DSLR to get started.
Practice using your smartphone first, learn how to take a good photograph with what you already have and then consider upgrading if you want to take photography more seriously.
Here are my top 10 travel photography tips for smartphone users, sure to help you ramp up your Instagram game!
Travel Photography Tips: How To Take Good Photos On Your Smartphone
Find these smartphone travel photography tips handy? Pin this to your travel board on Pinterest >>
1. Invest in a smartphone with a quality camera
The first thing you need to do in order to mimic professional travel photography on your smartphone is to use a device with a quality camera.
The Samsung Galaxy S7, LG G5, Google Pixel XL, Nokia 808 Pureview and Apple iPhone 7 are all fantastic smartphones with highly rated cameras.
Look after your smartphone and try not to drop it every 5 minutes…
I dropped my Galaxy a few too many times and definitely saw a noticeable difference in the quality of my photos.
2. Take photographs in natural light
Something so important when attempting to take professional looking photos on a device that fits into your top pocket is to make sure your lighting works for you.
The reason why your smartphone photos usually turn out dim and grainy is because you’re not using enough natural light.
Your travel photos will always look better outside on a clear, sunny day than inside a room or when it is overcast.
That said, at certain times of the day it can be too bright outside and cause a white cast on your photos…
To solve this problem, the best times of the day to shoot are early in the morning (sunrise and just after) and late afternoon (sunset and just before).
This way you’re still getting that soft, natural light but you won’t get the glare.
3. Hold your breath
Something that really sucks is when you think you’ve taken a good picture only to zoom in and find out it’s blurry.
Why does this happen?
Well most of the time it’s because you’ve moved ever so slightly, which may be because you had shaky hands, unsteady balance or simply breathed.
Due to the shape and size of a smartphone, taking clear, still photographs can be tricky but one way to keep as still as possible is to hold your breath.
This way, your shoulders won’t move up or down, your hands will remain in the same position and you’ll be able to gain complete focus.
Also, I wouldn’t recommend using the zoom feature on most smartphones because your photos will turn out pixelated and blurry – the further you zoom, the harder it is to control.
4. Invest in a small tripod or gorilla pod
An easy way to take perfectly still shots from the best angles is to use a small tripod or gorilla pod with a screw on phone mount/bracket/holder.
This way, you can also take quality selfies and group shots using self-timer.
The thing I love about the gorilla pod is that you can wrap it around a tree branch while you’re hiking through the jungle or you can mount it on a table top whilst out for tapas and wine with your friends…
They are so multi-functional and very handy!
5. Remember the rule of thirds
In simple terms, to practice the rule of thirds you should imagine splitting an image into thirds (horizontally and vertically) which will give you 9 parts.
When you have the grid in mind, you’ll have four important intersections within the image which you should place your points of interest on when framing the shot.
The imaginative grid will also give you four lines which provide another good guideline for positioning elements such as horizons in your photo.
By placing your focal point on any of these intersections or lines, your photo will become more balanced and natural for the viewer look at.
Don’t get me wrong, placing your focal point in the centre of the shot won’t put you in photography jail, after all, these kinds of photos do well on platforms like Instagram…
That said, if you want to mimic professional travel photography on your smartphone, try to play by the rules.
6. Practice attention to detail
One thing I learned after improving my photography on a smartphone was that you really have to pay attention to detail.
A lot of the time you can become so focused on your point of interest that you ignore everything else going on behind or beside it…
Then, when you look back on the photo, you find:
- People moving in the background
- Odd objects peaking through on the side
- Too much glare
- Not enough light
- Blur
- Wonky horizons
- Cut off feet, hands, etc
- Double chins or large foreheads (angle)
When framing your shot, always look at the whole picture…
Make sure your horizons are straight, there are no distractions surrounding the focal point, you’ve got enough light coming in, your angle is flattering, you’re following the rule of thirds, and everyone/everything in the shot is ready to go.
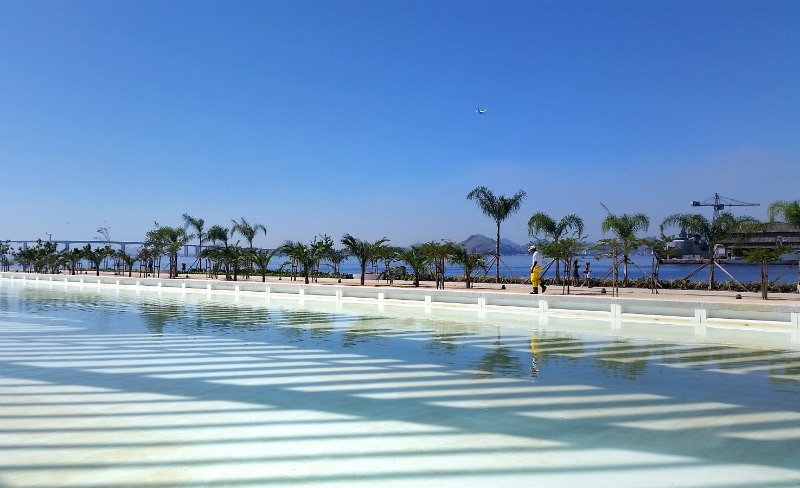
7. Shoot at different angles
When practicing travel photography on your smartphone, it’s always good to experiment with different angles.
While some angles won’t do your focal point any favours, you may discover a few unique perspectives.
This is where your gorilla pod would also come in handy because you can hang it above the point of interest, wrap it around your arm, and all sorts.
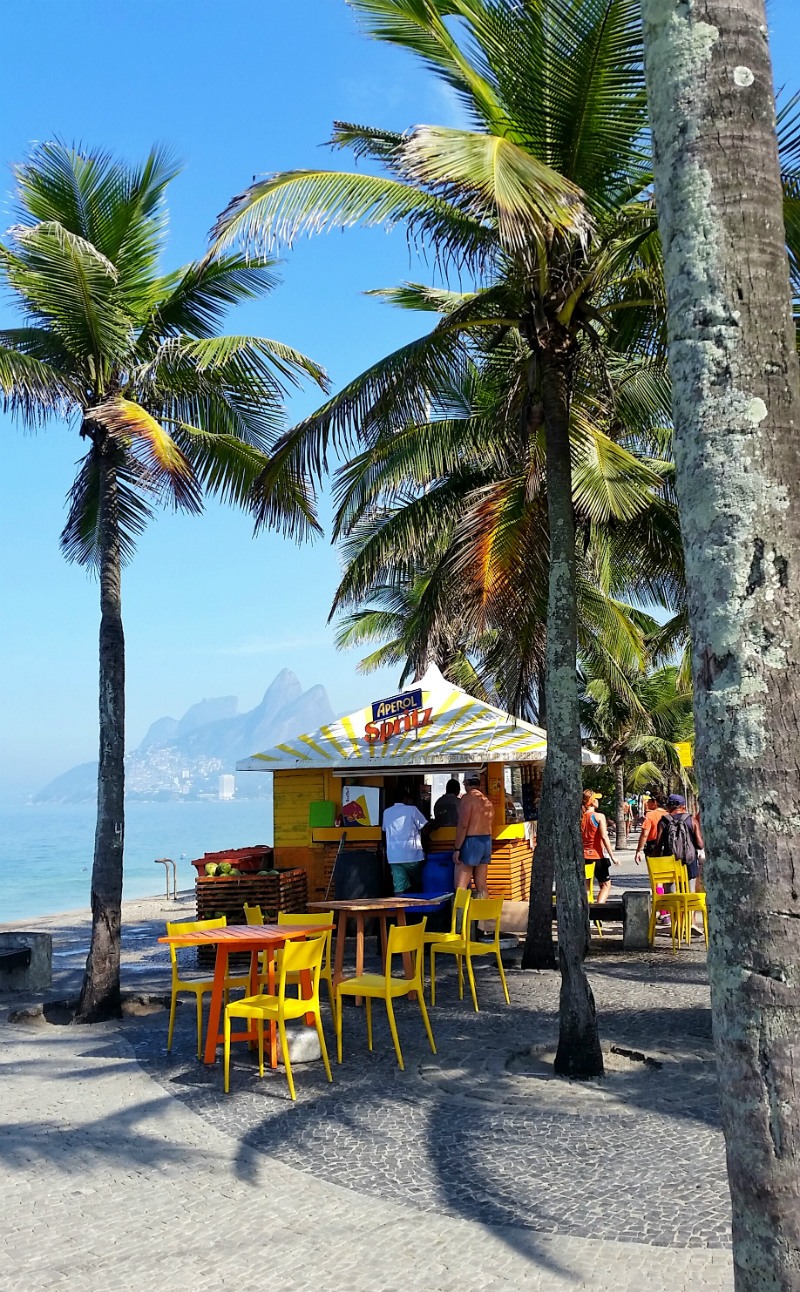
8. Consider the colours within the shot
Before hitting the shutter button, it’s important to look at the colour contrast within the shot.
If you’re working with dark or grey toned colours, it can be difficult to produce a stand-out, eye-catching photo, especially if you haven’t got a lot of natural light coming through.
Try to strike a balance between dark and light colours within your photo and work in a pop of colour (unless you’re going for black and white).
Photos full of every colour in the rainbow can also be too much for the eye and off-putting, so again, it’s about finding the balance.

9. Download an editing app
Just being honest here, I am useless when it comes to Photoshop…
If I had more time to learn about it, I’d be using it, but right now, while my focus is not particularly on photography, I am quite happy using a smartphone app.
If you know how to use Photoshop and think you can pick it up easily, then by all means, use it because it will give you the best quality result.
Now if Photoshop is not your strong suit, I would recommend using the free smartphone app, Snapseed.
Snapseed is like, my best friend…
It has absolutely everything I need to edit a photo beautifully and is so easy to use.
Once you’ve used it just a couple of times, you’ll realise how simple it is to turn an ‘ok’ photo into an almost professional looking photo.
I’ve tried numerous different photo editing apps but this one is by far my favourite because of all of it’s advanced functionalities.
Some of my favourite functionalities include:
- Brightness/Contrast
- Highlights/Shadow
- Saturation
- Ambience
- Structure
- Sharpening
- Crop/Rotation
- Selective editing
- Brush
- Healing
And by the way, I wasn’t paid by Snapseed to write this, I genuinely love this app.
Now, a quick note about saturation…
Use it sparingly!
I’ve come across far too many instances on Instagram where someone has gone completely overboard on saturation and turned a good photo into a luminous orange mess.
Yes, saturation intensifies the colours in your photo, which is why you really do need to be careful, otherwise you’ll run the risk of your photo looking totally cheap and fake.
10. Take your time
Finally, it’s important to chill out and make space in your travel itinerary for taking photos.
If you’re rushing around and snapping everything last minute, you’ll end up with a bunch of unusable photos.
The same goes for if you’re traveling in a group…
Sometimes it can be difficult to stop and take photos every 5 minutes when everyone else is on a mission to get somewhere, so schedule a few hours to go off at your own leisurely pace.
Capturing the photo itself also requires you to take your time and focus, so remember this and you’ll walk away with many more quality shots.
And on that note, take more than one photo! Take 10 if necessary! This way, if a photo doesn’t turn out, you have 9 others to choose from.
I can’t tell you how many times I’ve seen people take one photo and walk away…
What if!
Smartphone Travel Photography Tips Conclusion
I hope these smartphone travel photography tips have been helpful for you!
I’ve used all 10 strategies to improve my own travel photography without owning a DSLR and have received countless compliments to date.
Someone even contacted me recently to purchase one of my photos, which I never thought would happen!
As I said, I’m no professional but by following these 10 strategies I’ve learned a lot and have watched the quality of my photos reflect that.
So if you are passionate about photography but not up to the level of buying a DSLR yet, use what you already have to get practicing.
The principles are the same, whether you’re using a $5,000 camera, an $800 smartphone or a $100 point and shoot.
Just start putting these principles into practice and you will see immediate improvements in your travel photography.
Do you have an Instagram account? Comment below with your handle below so we can see your progress!
And if you would like to see more of our own smartphone shots, remember to follow us on Instagram: @storyv_com.
Liked it? Pin it!
Over to you! Leave your thoughts in the comments section below…
- Are you a photographer and have some more smartphone photography tips to add? Please share!
- Are you wanting to improve your Instagram game and looking for more travel photography tips? Ask away!
This post contains some affiliate links. If you click on one and make a purchase, we will receive a small commission to keep the site running and providing free content at no extra cost to you.


Comments are closed.