


Summer is when you can do different kinds of activities, such as traveling or just staying at home to do crafts. If you have kids, it’s best to teach them simple crafts, especially if you are on a budget and don’t want to spend much to make the summer season enjoyable.
What’s good about doing DIY crafts is that they don’t require special skills or tools. It’s a great way to spark creativity and get relieved by summer boredom. These summer crafts can be done easily under 30 minutes and on a budget. Just be resourceful in finding things at home.
It’s best to recycle to give your old things a new life and help the environment by reducing waste. These are worthwhile craft ideas that can be enjoyed by the whole family.
Ice Cream Keychain
Keychains are often used as a souvenir, gifts for your loved ones, or given as tokens. For some people, it has sentimental value that can be a symbol of a cherished moment. Take a look at the colorful felt balls to produce an ice cream keychain.
Materials
- Felt balls (2 cm)
- Tan felt sheets
- Other colors of felt sheets for the sprinkles
- Glue
- Brown marker
- Pliers
- Keychain parts
- Eye pin
Steps
- Cut a quarter circle on the tan felt sheet to create a cone shape. Get the correct size for the template because the felt balls measure 2 cm. You now have a template pattern for all the cones.
- To form the cones, use a glue gun at the edges of the felt sheet. After, hot glue the felt balls to attach them to the cone. Draw with the brown marker to crosshatch the cone to form a waffle look. Add your desired design for your ice cream. Use bright, vibrant colors to have a fresh appearance.
- Cut a roughly .75 inch in the eye pin. Push it down until the only eye part is revealing. Attach the jump ring to the felt ball ice cream cone. The jump ring is a part of the keychain.
Tie-Dye Picnic Blanket
Having leisure time to walk and have a picnic on the grassy land in the park while enjoying the warm weather is a great way to enjoy the summer weekends.
You need to bring a vibrant picnic blanket to place your tasty dishes on that you’ve created. If you don’t have one, create a DIY tie-dye picnic blanket without spending much.
Materials
- Tulip dye bottle (or a recycled water bottle for cheap)
- Water
- Turkish blanket or any plain blanket you have at home
- Large plastic
- Gloves
- Rubber band
Steps
- Fill water on each Tulip dye bottle. Tighten the lid and shake well to dissolve completely. Soak the Turkish blanket in water to ensure it is drenched and wring it out after. It must stay slightly wet to avoid getting burned in the microwave.
- Use your desired colors to tie-dye the blanket. Place the damp blanket on top of the large plastic. Start folding into four sections in the tip part of the blanket. Then tie each section with a rubber band. Add two rubber bands around the blanket. Make sure to leave the middle section blank.
- Lay the damp Turkish blanket on a plastic sheet. Wear gloves when applying the dye. Dye each side. Make space for each color so it cannot be messy.
- Put only the dyed section in a two-minute tie-dye container. Close the lid tightly and microwave for 2-3 minutes.
- Next, let it cool for 15 minutes with the cover closed. Uncover it, and cool for 5 minutes again.
- Cut the rubber band. Open it carefully to view the design and rinse only the dyed section in cold water. Wash again and dry.
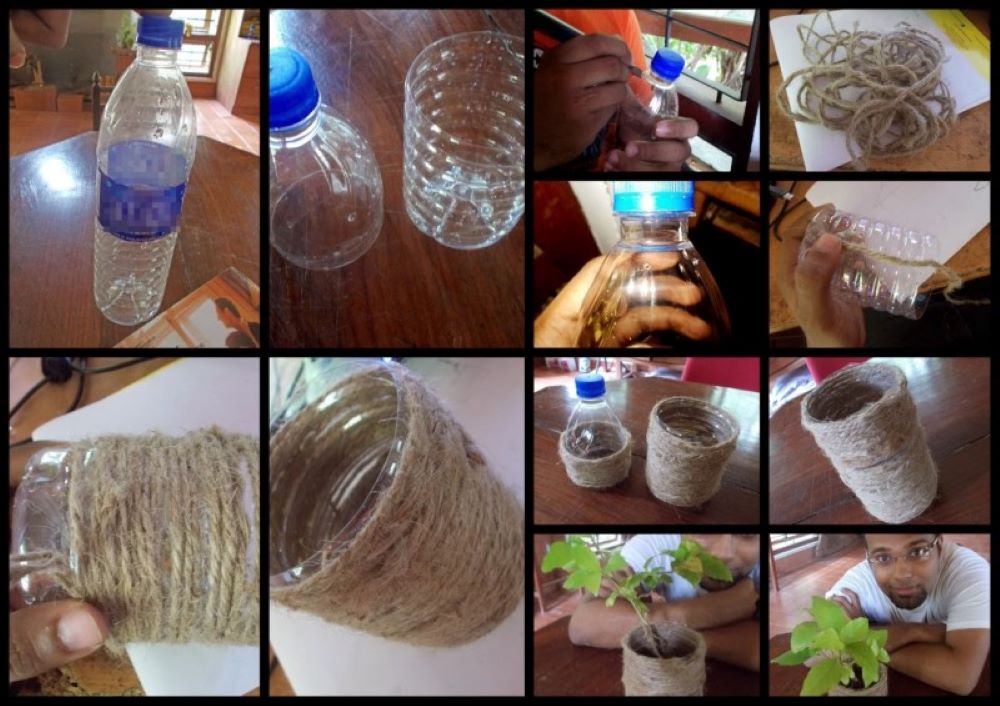
Mod Podge Water Bottles
If your kids have old water bottles, give them a new life by designing them. Teach them how to customize their bottles with handmade designs. Check out these steps.
Materials
- Water bottles
- Magazine, decal stickers, or pastel-colored paper
- Glue
Steps
- Cut out small shapes or your favorite figures from the magazine or pastel-colored paper.
- Use a reusable water bottle. Apply the Mod Podge Dishwasher-Safe Gloss on the outside of the bottle with a Mod Podge paintbrush so it can wash. Then, place the shapes or the desired figures where you want them on the bottle. Repeat the process and dry thoroughly.
- Be more creative in designing your customized bottle. For instance, you could add wool hand knitting yarn for a presentable look, but you can remove it when you are washing it.
Conclusion
These summer crafts are simple but will surely be enjoyed by your kids. Just by being resourceful and creative, you can create a useful masterpiece and not just a decorative piece, and you can do so on a budget.


